Mexican Squash and Bean Salad

Mexican Squash and Bean Salad

Sweet squash and black beans simmered with chili, oregano and tomatoes on top of crispy greens make for a satisfying and tasty main course salad with the bonus of plenty of fibre. The zesty lime yogurt dressing and cheese complement this dish perfectly. For added crunch, make some baked tortilla chips to add on top of the salad or as a side.

Preparation time 20 minutes
Cooking time 25 minutes
Yield 4 servings

Nutritional information

  • Per serving

  • Energy:

    342 Calories

  • Protein:

    19 g

  • Carbohydrate:

    43 g

  • Fat:

    13 g

  • Fibre:

    12.6 g

  • Sodium:

    411 mg

  • Top 5 Nutrients

    (% DV*)

  • Calcium:

    27 % / 349 mg

  • Folate:

    119 %

  • Vitamin A:

    83 %

  • Thiamin:

    75 %

  • Vitamin C:

    64 %

  • *percentage of daily value

Ingredients

    • 1 tbsp (15 mL) butter
    • 1 small onion chopped
    • 2 cloves garlic minced
    • 1 tbsp (15 mL) chili powder
    • 1 tsp (5 mL) dried oregano
    • Salt and pepper
    • 1 1/2 cups (375) diced (1/2 inch/1 cm pieces) fresh or frozen butternut squash thawed
    • 1/2 cup (125 mL) water
    • 1 1/2 cups (375) canned no-salt-added diced tomatoes with juice
    • 1 cup (250 mL) cooked or drained and rinsed canned unsalted black beans
    • 1/2 cup (125 mL) frozen corn kernels thawed
    • 2 small corn or whole wheat tortillas
    • 1/2 to 1 tsp (2 to 5 mL) grated lime zest
    • 1 1/2 tbsp (22 mL) freshly-squeezed lime juice divided
    • 1/2 cup (125 mL) plain Greek yogurt
    • 1 cup (250 mL) shredded Mozzarella
    • 8 cups (2 L) torn romaine lettuce
    • 1 cup (250 mL) cherry tomatoes cut in half
    • Chopped fresh cilantro (optional)

Preparation

  1. Preheat oven to 350°F (180°C). Line a large baking sheet with parchment paper.
  2. In a large skillet, melt butter over medium heat. Sauté onion, garlic, chili powder, oregano, 1/8 tsp (0.5 mL) salt and 1/4 tsp (1 mL) pepper for about 2 minutes or until onion starts to soften. Add squash and sauté for 1 minute or until onion is soft. Stir in water. Cover and boil for 5 minutes.
  3. Stir in canned tomatoes, beans and corn. Reduce heat to medium-low, cover and boil gently, stirring occasionally, for about 15 minutes or until squash is soft.
  4. Meanwhile, cut each tortilla into 12 thin wedges. Arrange in a single layer on prepared baking sheet. Bake in preheated oven for 8 to 10 minutes or until golden and crisp. Set aside.
  5. In a small bowl, stir lime zest and 1/2 tbsp (7 mL) lime juice into yogurt and season with a pinch each of salt and pepper.
  6. Remove squash mixture from heat. Stir in remaining lime juice and half of the shredded cheese until melted. Season to taste with pepper and up to 1/8 tsp (0.5 mL) more salt.
  7. In a large bowl, combine half of the lime yogurt and lettuce; toss to coat. Divide lettuce among serving plates. Spoon squash mixture on top of salad and top with remaining shredded cheese and grape tomatoes. Dollop with remaining lime yogurt, top with baked tortilla chips. Sprinkle with cilantro (if using).
Bulb

To save time, look for pre-cut, peeled butternut squash in the produce section of the supermarket (you might have to cut in into smaller pieces) or diced frozen squash in bags in the frozen foods section; let it thaw and drain off excess liquid before adding to the skillet.

To cook beans from dried, you’ll need to soak 1/2 cup (125 mL) dried beans overnight, then cook according to package directions until tender. If using canned beans, you’ll need about two-thirds of a 14 oz (400 mL) can or half of a 19 oz (540 mL) can. Look for those with no salt added or as low in sodium as possible. Strain the liquid from the beans and rinse under cold, running water, then drain well.

For an extra punch of flavour, add 2 tbsp (30 mL) canned diced green chilies or drained pickled jalapeno peppers with the canned tomatoes.

If you like extra heat, use a Monterey Jack or Havarti with hot peppers and add some hot pepper sauce to the squash with the lime juice, or season to taste with hot pepper sauce at the table.

For more great recipes, visit Dairy Farmers of Canada
Veggie-Cheddar Spring Rolls

Veggie-Cheddar spring rolls

These crisp and tender spring rolls present a satisfying combination of fresh flavours and contrasting textures. They’re also much easier to make than you might think.

Preparation time 25 minutes
Cooking time 6 minutes
Yield 4 servings

Nutritional information

  • Per serving

  • Energy:

    313 Calories

  • Protein:

    16 g

  • Carbohydrate:

    19 g

  • Fat:

    19 g

  • Fibre:

    1.8 g

  • Sodium:

    603 mg

  • Top 5 Nutrients

    (% DV*)

  • Calcium:

    26 % / 341 mg

  • Selenium:

    54 %

  • Vitamin C:

    53 %

  • Vitamin A:

    44 %

  • Vitamin B12:

    41 %

  • *percentage of daily value

Ingredients

    • 3 eggs
    • Salt
    • Freshly ground pepper
    • 8 rice paper wrappers
    • 16 fresh mint leaves
    • 2 1/2 cups (625 mL) vegetables ½ cucumber, 1 carrot, ½ bell pepper, julienned
    • 8 sprigs of cilantro
    • 6 oz (180 g) Canadian Aged Cheddar cut into 8 sticks

    Homemade nuoc cham sauce

    • 1/4 cup (60 mL) water
    • 2 tbsp (30 mL) fish sauce
    • 2 tsp (10 mL) honey or sugar
    • 1 tbsp (15 mL) rice vinegar
    • 1 tbsp (15 mL) finely grated carrots
    • 1/2 tsp (2 mL) hot pepper flakes
    • 1 clove garlic minced

Preparation

  1. Heat a non-stick skillet on medium heat. Beat eggs with some salt and pepper and pour into skillet. Cook eggs 2–3 minutes on each side to make an omelette. Transfer onto a plate and let cool. Cut omelette into 8 large strips.
  2. Fill a large bowl with hot water and soak a rice paper wrapper approximately 15 seconds to soften. Transfer to a work surface. In the following order, place 2 mint leaves, a strip of omelette, 1/8 of the vegetables, a sprig of cilantro and a stick of cheese on the first third of the wrapper, leaving a 1˝ (2.5 cm) border on each side.
  3. Fold in the sides of the wrapper over the filling and then roll into a tight cylinder.
  4. Repeat steps for the remaining 7 wrappers.
  5. Serve with a small bowl of homemade or store-bought nuoc cham for dipping.

Homemade nuoc cham sauce

  1. Place all ingredients in a jar.
  2. Close and shake well. Store in the refrigerator.
Bulb

Cheese alternatives: Canadian Mild or Medium Cheddar, Gouda.

For more great recipes, visit Dairy Farmers of Canada
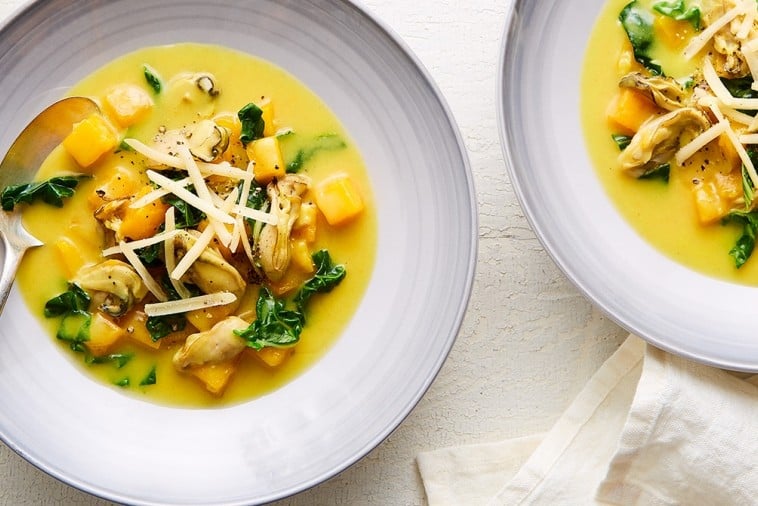
Cheesy Curry Oyster Stew

Cheesy curry oyster stew
Preparation time 15 minutes
Cooking time 20 minutes
Yield 4 – 6 servings

Nutritional information

  • Per serving

  • Energy:

    283 Calories

  • Protein:

    18 g

  • Carbohydrate:

    14 g

  • Fat:

    18 g

  • Fibre:

    1.6 g

  • Sodium:

    430 mg

  • Top 5 Nutrients

    (% DV*)

  • Calcium:

    29 % / 371 mg

  • Vitamin B12:

    427 %

  • Zinc:

    416 %

  • Selenium:

    63%

  • Niacin:

    51 %

  • *percentage of daily value

Ingredients

    • 1 tbsp (15 ml) butter
    • 2 French shallots chopped
    • 2 cloves garlic chopped
    • 2 1/2 cups (625 ml) butternut squash diced
    • 1 tsp (5 ml) curry paste or powder
    • 2 cups (500 ml) vegetable broth no salt added
    • 4 cups (1 L) chard coarsely chopped
    • 48 fresh oysters shucked, with their juice
    • 2 cups (500 ml) Canadian Smoked Cheddar grated
    • 1 tbsp (15 ml) cornstarch
    • Freshly ground pepper

Preparation

  1. In a large saucepan, melt butter on medium-high heat. Cook shallots and garlic for 2 min.
  2. Add squash and curry paste; cook 2 more min. 
  3. Pour broth into saucepan and bring to a boil. Simmer, covered, for 5–7 min or until squash begins to soften.
  4. Add chard and stir; cook for 2–3 min.
  5. Add oysters and cook 3 more min.
  6. Mix cheese with cornstarch. Sprinkle over mixture in saucepan while stirring. Let cheese melt and sauce thicken. Add a little cornstarch mixed with cold water if sauce is not thick enough, as the quantity of oyster juice may vary.
  7. Season with pepper, top with more cheese, if desired, and serve. 
Bulb

Cooking tip: When shucking oysters, hold the curved side of the shell down to retain all the juice, which will add delicious flavour to the sauce.

Cheese alternatives: Canadian Provolone, Gouda, Aged Cheddar.

For more great recipes, visit Dairy Farmers of Canada
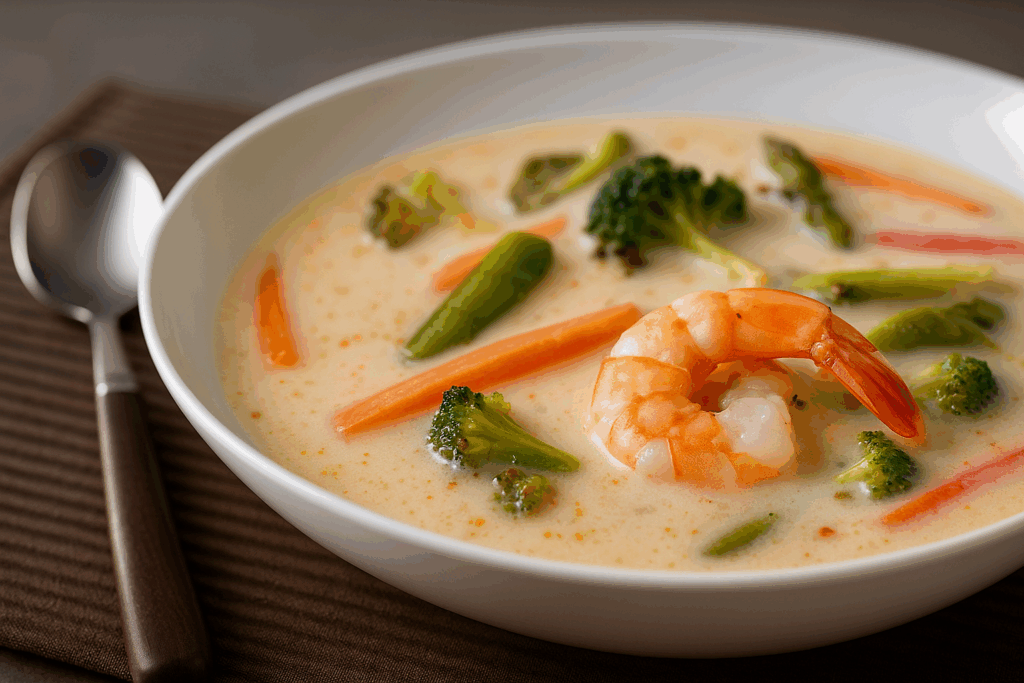
Shrimp, Vegetable & Coconut Milk Soup

Shrimp, Vegetable & Coconut Milk Soup
Preparation time 55 minutes
Cooking time 10 minutes
Yield 4 servings

Nutritional information

  • Per serving

  • Energy:

    384 Calories

  • Protein:

    20 g

  • Carbohydrate:

    48 g

  • Fat:

    13 g

  • Fibre:

    9.6 g

  • Sodium:

    317 mg

  • Top 5 Nutrients

    (% DV*)

  • Calcium:

    21 % / 273 mg

  • Vitamin B12:

    66 %

  • Vitamin A:

    53 %

  • Vitamin D:

    44 %

  • Riboflavin:

    37 %

  • *percentage of daily value

Ingredients

    • 1 1/4 cups (310 mL) shredded coconut
    • 2 3/4 cups (680 mL) Milk
    • 1 1/2 cups (375 mL) Vegetable broth or fish broth
    • 1/2 tsp (2 mL) Thai red chili paste
    • 4 cups (1 L) frozen Asian-style vegetable mix
    • 1 cup (250 mL) cooked small shrimp
    • 1 tsp (5 mL) lime juice
    • 2 green onions chopped
    • 2 tbsp (30 mL) fresh Thai basil chopped

Preparation

  1. Heat milk at medium heat to just before boiling point. Remove from heat and stir in coconut. Let sit 45 minutes.
  2. Strain, squeezing coconut to get all liquid. Set “coconut milk” aside. Bring broth to a boil. Stir in chili paste. Add frozen vegetables and cook until barely tender. Add “coconut milk” and shrimp. Gently reheat.
  3. Spoon soup into bowls. Add lime juice, sprinkle with green onion, basil and serve.

For more great recipes, visit Dairy Farmers of Canada
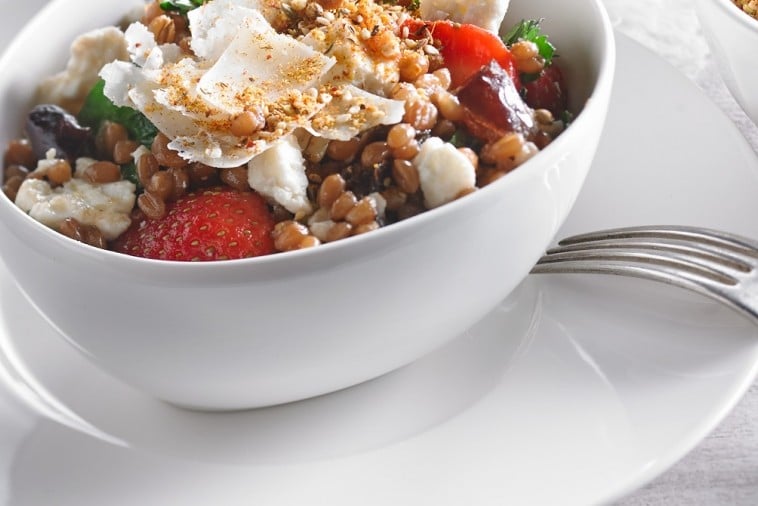
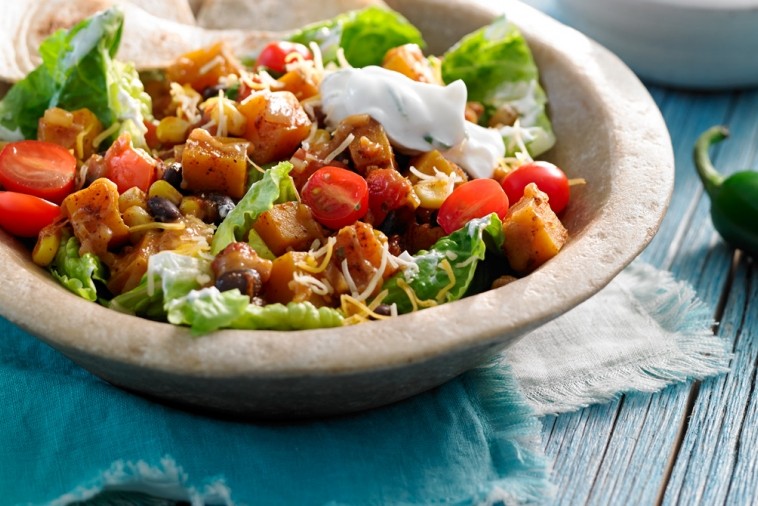
Wheat Berry Salad with Dukkah

Wheat Berry Salad with Dukkah

Everyone is cooking with whole grains these days, and wheat berries are all the rage! The berry is the entire wheat kernel – before it is ground into flour. You can buy wheat berries, cook them like any other grain, and turn them into this delicious and unusual summer salad.

Preparation time 30 minutes
Cooking time 1 hr 5 minutes
Refrigeration 1 hour
Yield 4-6 servings

Nutritional information

  • Per serving

  • Energy:

    401 Calories

  • Protein:

    15 g

  • Carbohydrate:

    40 g

  • Fat:

    22 g

  • Fibre:

    7.7 g

  • Sodium:

    390 mg

  • Top 5 Nutrients

    (% DV*)

  • Calcium:

    24 % / 311 mg

  • Selenium:

    63 %

  • Magnesium:

    40 %

  • Phosphorus:

    32 %

  • Vitamin C:

    32 %

  • *percentage of daily value

Ingredients

    • 1 cup (250 mL) wheat berries
    • 6 oz (180 g) Canadian Feta crumbled
    • 1 cup (250 mL) sliced strawberries
    • 12 large dried dates coarsely chopped
    • 1/4 cup (60 mL) flat parsley leaves
    • 2 tbsp (30 mL) olive oil
    • 1 tbsp (15 mL) white balsamic vinegar
    • Canadian Parmesan shavings

    Dukkah

    • 1/4 cup (60 mL) sesame seeds
    • 2 tsp (10 mL) coriander seeds
    • 2 tsp (10 mL) cumin seeds
    • 1/4 cup (60 mL) hazelnuts
    • 1/4 cup (60 mL) pistachio nuts
    • Salt and pepper to taste

Preparation

  1. Cook wheat berries in a large quantity of boiling water until tender but still slightly al dente, about 55 min. Drain and transfer to a large bowl.
  2. Add remaining salad ingredients including Feta and mix well. Refrigerate 1 hour.

DUKKAH

  1. Preheat oven to 350 °F (180 °C).
  2. In a dry pan, toast sesame seeds until golden. Transfer to a small food processor. In the same pan, toast coriander and cumin seeds until fragrant. Add to the food processor.
  3. Spread hazelnuts and pistachios on a baking sheet and bake in the middle of the oven about 5 min or until nuts are fragrant. Transfer nuts to a clean kitchen towel, fold the towel into a bundle and rub the nuts together to skin them as thoroughly as possible.
  4. Add the skinned nuts to the food processor. Pulse until the mixture is blended and the nuts are in fine pieces.
  5. Serve the salad with the dukkah on the side in a small bowl with a spoon for guests to sprinkle to their taste.
Bulb

Dukkah is a blend of nuts and spices used abundantly in Egypt and elsewhere in the Middle East. People sprinkle it on salads, grilled meats and vegetables, and eat it on pita bread dipped in oil.

Keep leftover dukkah refrigerated in a tightly sealed jar.

For more great recipes, visit Dairy Farmers of Canada
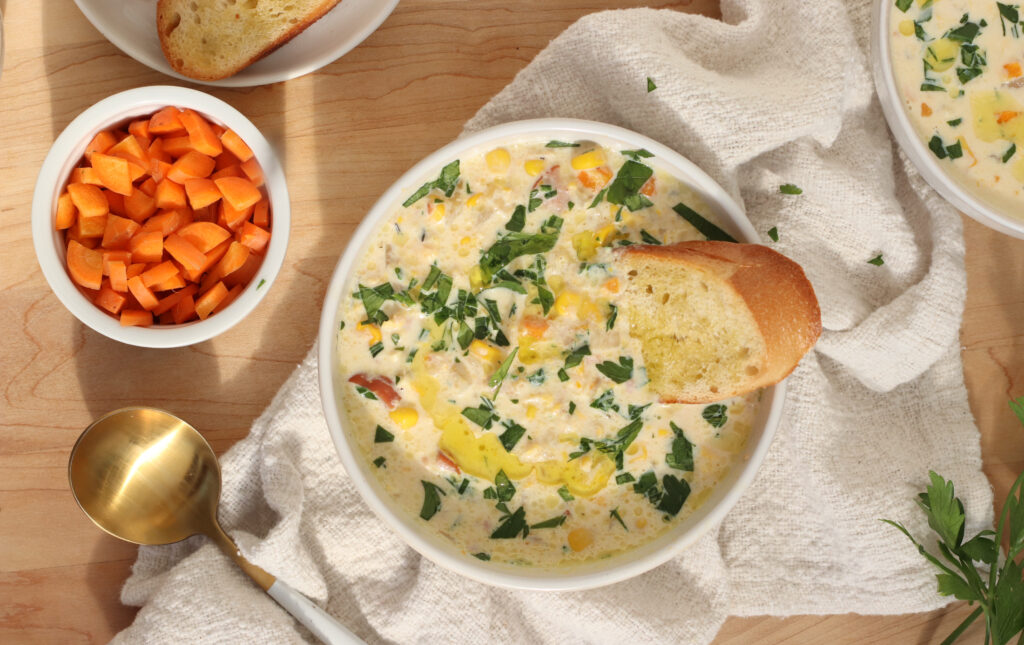
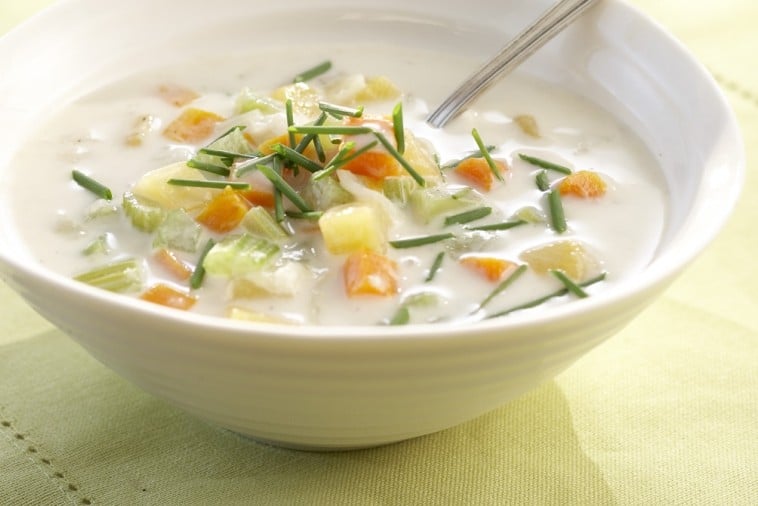
Corn Soup

Corn Soup
Corn Soup
Preparation time 45 minutes
Cooking time 30-35 minutes
Yield 6 servings
Recipe created by Stefano Faita

Nutritional information

  • Per serving

  • Energy:

    311 Calories

  • Protein:

    16 g

  • Carbohydrate:

    47 g

  • Fat:

    9 g

  • Fibre:

    5.4 g

  • Sodium:

    361 mg

  • Top 5 Nutrients

    (% DV*)

  • Calcium:

    25 % / 328 mg

  • Vitamin B12:

    69 %

  • Vitamin D:

    62 %

  • Riboflavin:

    38 %

  • Folate:

    36 %

  • *percentage of daily value

Ingredients

    • 1 medium onion diced
    • 1 fennel bulb diced
    • 1 carrot diced
    • 6 corn on the cob shucked or 5-6 cups (1.25-1.5 l) frozen corn
    • 1/2 cup (125 mL) diced ham
    • 3 sprigs thyme
    • 6 cups (1.5 L) Milk
    • Salt and pepper to taste
    • 1 tbsp (15 mL) fresh italian parsley finely chopped
    • Dash of olive oil

Preparation

  1. Sauté onion in a skillet and cook for 3 or 4 minutes. Add the other vegetables and cook for 5 to 7 minutes. Add diced ham and thyme, then cook for another 2 to 3 minutes.
  2. Lower heat, add milk and allow to simmer gently for around 20 minutes. Thicken soup with a few pulses from a hand blender. Season to taste. Garnish with finely chopped parsley and drizzle with olive oil just before serving.

For more great recipes, visit Dairy Farmers of Canada
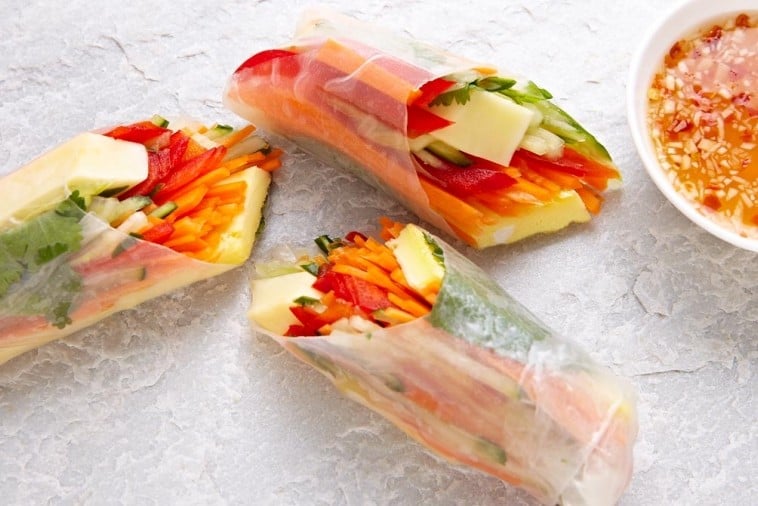
Caprese Tomato & Melon Stacks

Caprese Tomato & Melon Stacks

This twist on a traditional Caprese salad takes the fresh flavours of tomatoes, basil and Bocconcini cheese and adds the sweetness of watermelon and tang of vinegar, all in attractive stacks. Serve as an appetizer for a summer meal, or as a delightful snack on their own.

Preparation time 15-20 minutes
Refrigeration 30 minutes to 8 hours
Yield 4 servings, 12 stacks

Nutritional information

  • Per serving

  • Energy:

    207 Calories

  • Protein:

    8 g

  • Carbohydrate:

    34 g

  • Fat:

    6 g

  • Fibre:

    2.2 g

  • Sodium:

    239 mg

  • Top 5 Nutrients

    (% DV*)

  • Calcium:

    6 % / 75 mg

  • Vitamin C:

    66 %

  • Magnesium:

    22 %

  • Vitamin A:

    21 %

  • Pantothenic Acid:

    16 %

  • *percentage of daily value

Ingredients

    • 1/2 cup (125 mL) white wine vinegar or white balsamic vinegar
    • 2 tbsp (30 mL) fresh basil, chopped
    • 1/4 tsp (1 mL) salt
    • 1/4 tsp (1 mL) pepper
    • 6 pieces of watermelon sliced in triangles (each 3 in (7.5 cm) wide by ½ in (1 cm) thick)
    • 4 balls Bocconcini cheese (about 3-1/2 oz/100 g)
    • 2 plum tomatoes
    • 12 very small fresh basil leaves
    • 12 toothpicks
    • Freshly cracked black pepper

Preparation

  1. In a large shallow dish or container, combine vinegar, chopped basil, salt and pepper.
  2. Cut rind from each watermelon slice; cut each slice in half on a diagonal to make 2 triangles. Cut each Bocconcini cheese ball into 6 slices, for a total of 24 slices.
  3. Add watermelon and Bocconcini slices to vinegar mixture, tilting dish to coat. Cover and let marinate in the refrigerator for at least 30 minutes or up to 8 hours.
  4. Cut tomatoes crosswise into twelve slices, each about 1/4 inch (0.5 cm) thick. Dip into marinade to coat both sides.
  5. For each stack, layer a slice of melon, a slice of Bocconcini, a slice of tomato, and another slice of Bocconcini. Top with a basil leaf and stick a toothpick vertically in the centre to secure stacks. Discard excess marinade.
  6. Arrange stacks on a platter or individual serving plates and sprinkle with fresh cracked pepper.
Bulb

You’ll need a wedge about one-eighth of a medium-size watermelon, or half of a mini watermelon to cut the triangles for this recipe.

You can start marinating the bocconcini up to 24 hours ahead of serving but the watermelon is best if marinated up to 8 hours. The assembled stacks can be covered and refrigerated for up to 4 hours before serving.

Replace the watermelon with twelve 1-1/2 inch (3.5 cm) triangles or wedges, about 1/2 inch (1 cm) thick, peeled honeydew melon, or use a mixture of watermelon and honeydew.

For more great recipes, visit DairyFarmersofCanada.ca

Caramelized Onion and Arugula Quinoa

Caramelized onion and arugula quinoa
Bulb

Cooking quinoa in milk creates a soft, creamy texture similar to polenta. In this dish the quinoa is accented with sweet and savoury caramelized onions and a peppery punch of arugula. It provides a pleasant change from the ordinary as a side dish for grilled or roasted fish, chicken or pork tenderloin.

Preparation time 15 minutes
Cooking time 45 minutes
Yield 4 servings

Nutritional information

  • Per serving

  • Energy:

    279 Calories

  • Protein:

    12 g

  • Carbohydrate:

    41 g

  • Fat:

    8 g

  • Fibre:

    4.5 g

  • Sodium:

    300 mg

  • Top 5 Nutrients

    (% DV*)

  • Calcium:

    17 % / 218 mg

  • Folate:

    52 %

  • Magnesium:

    46 %

  • Vitamin B12:

    33 %

  • Phosphorus:

    31 %

  • *percentage of daily value

Ingredients

    • 2 onions
    • 1 tbsp (15 mL) butter
    • 2 cloves garlic minced
    • 1/2 tsp (2 mL) dried thyme
    • 1/2 tsp (2 mL) salt
    • Pepper
    • 1 cup (250 mL) quinoa rinsed
    • 1 tbsp (15 mL) whole wheat flour
    • 2 cups (500 mL) milk heated
    • 1/4 cup (60 mL) water
    • 4 cups (1 L) chopped trimmed baby arugula

Preparation

  1. Cut onions in half lengthwise and trim out cores. Cut crosswise into thin slices.
  2. In a medium, deep saucepan, melt butter over medium-high heat. Sauté onions for 2 minutes or until starting to wilt. Reduce heat to medium-low, cover and cook, stirring occasionally, for about 15 minutes or until very soft and caramelized.
  3. Increase heat to medium. Add garlic, thyme, salt and pepper to taste; sauté for 2 minutes. Stir in quinoa and flour; gradually stir in milk and water. Bring to a simmer, stirring occasionally. Reduce heat to low, cover and simmer, stirring twice, for 15 minutes or until quinoa is creamy and tender. Remove from heat and let stand, covered, for 5 minutes. Gently stir in arugula just until wilted.
Bulb

Arugula has a peppery, slightly bitter flavour which works well with the sweet onions and creamy quinoa. For a milder dish, baby spinach makes a terrific alternative, or, use a mixture of arugula and spinach for just a little punch.

When cooking quinoa in milk, it tends to bubble up so using a deep saucepan and keeping an eye on it as it simmers helps prevent a boil-over.

For more great recipes, visit DairyFarmersofCanada.ca

Cream of Onion Soup with Cheese Crostini

Cream of onion soup with cheese crostini

A perfect soup for a chilly fall day.

Preparation time 20 minutes
Cooking time 30 minutes
Yield 6 servings
Recipe created by Josée Robitaille

Nutritional information

  • Energy

    303 calories

  • Protein

    12 g

  • Carbohydrate

    42 g

  • Fat

    10 g

  • Fibre

    3.8 g

  • Sodium

    395 mg

  • Top 5 nutrients provided by a serving of this recipe


    Nutrient and % DV*

  • Calcium

    18 % / 240 mg

  • Vitamin B12

    41 %

  • Folate

    39 %

  • Vitamin D

    32 %

  • Selenium

    29 %

  • * Note: The daily value (DV) is established by Health Canada and corresponds to the daily quantity recommended for each nutrient. The percentage of the daily value (% DV) indicates the proportion of the nutrient provided by a serving of the recipe, in comparison with the quantity recommended.

Ingredients

  • 3 tbsp (45 mL) butter

    6 cups (1.5 L) minced Spanish onion

    5-6 branches fresh thyme

    2 bay leaves

    3 tbsp (45 mL) flour

    3 cups (750 mL) milk

    1 cup (250 mL) sodium-reduced vegetable broth

    6 slices of French baguette rounds toasted

    1/2 clove garlic

    1/4 cup (60 mL) grated Swiss cheese

    Salt and pepper to taste

Preparation

  1. In a large pot, melt butter over medium-high heat, add onion, thyme, bay leaves. Cook covered for 15 minutes, stirring regularly to lightly caramelize. Add flour and cook 1 minute. Add milk and broth, season, cover and cook 15 minutes over medium-low heat.
  2. Remove the thyme stems and bay leaves. Purée soup using blender until homogenous. Rub one side of toasted baguette rounds with garlic and sprinkle with cheese. Place under grill until golden. Serve the crostini with the soup.

For more great recipes, visit DairyFarmersofCanada.ca

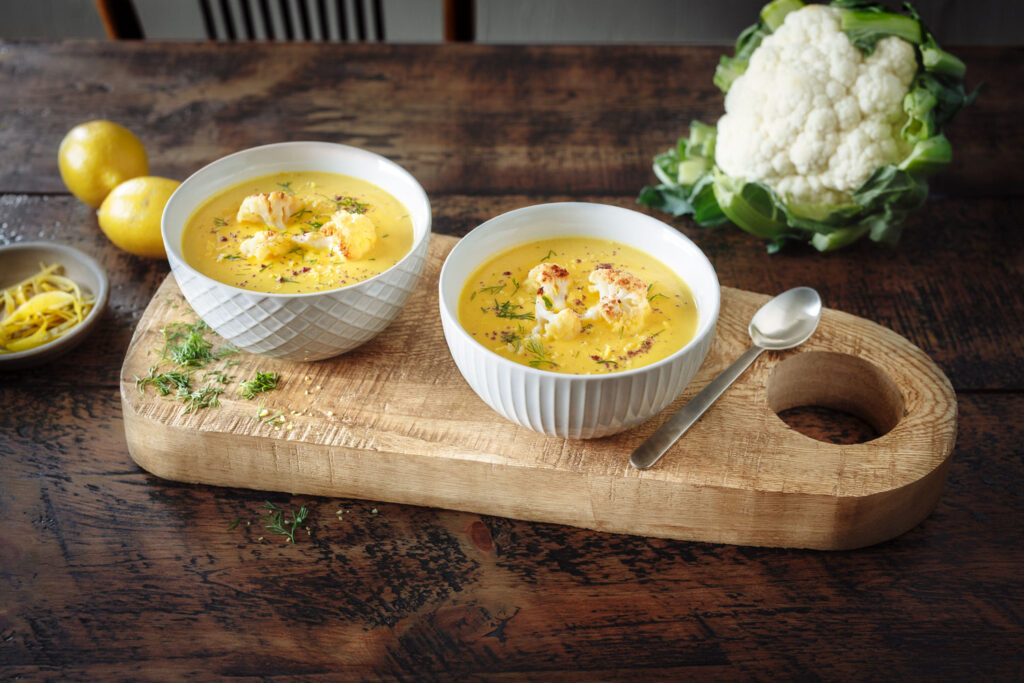
Oven-Roasted Cauliflower Soup

Oven-Roasted Cauliflower Soup

Hearty and nutritious, this soup can be made with fresh or frozen cauliflower. Serve it with a whole grain roll for a balanced meal. 

Preparation time 15 minutes
Baking time 25-35 minutes
Cooking time 15 minutes
Yields 6 servings
Bulb

Did you know that reducing food waste is one of the most important things you can do to reduce the environmental impact of your diet? Habits to reduce your food waste include planning and preparing your own meals, freezing extras, using wilted vegetables in soups and saving leftovers for the lunchbox. Every effort counts!   

Nutritional information

  • Energy

    268 Calories

  • Protein

    17 g

  • Carbohydrate

    34 g

  • Fat

    8 g

  • Fibre

    8.4 g

  • Sodium

    232 mg

  • Top 5 nutrients provided by a serving of this recipe


    Nutrient and % DV*

  • Calcium

    24 % / 312 mg

  • Vitamin C

    85 %

  • Thiamin

    77 %

  • Folate

    40 %

  • Niacin

    38 %

  • * Note: The daily value (DV) is established by Health Canada and corresponds to the daily quantity recommended for each nutrient. The percentage of the daily value (% DV) indicates the proportion of the nutrient provided by a serving of the recipe, in comparison with the quantity recommended.

Ingredients

  • 8 cups (2 L) fresh or frozen cauliflower florets (about 1 head if using fresh cauliflower)

    1 carrot, peeled and coarsely chopped

    1-2 tbsp (15-30 mL) butter, melted

    1 onion, chopped

    2 cloves garlic, minced

    1 tsp (5 mL) dried thyme leaves

    1 bay leaf

    2 1/2 cups (625 mL) no-salt-added vegetable broth

    1 can (19 oz/540 mL) unsalted white beans, drained and rinsed

    1 tbsp (15 mL) grainy Dijon mustard

    2 1/2 cups (625 mL) milk

    Freshly ground pepper

    Salt (optional)

    1/2 cup (125 mL) Cheddar cheese, shredded

    1/4 cup (60 mL) fresh dill, coarsely chopped

    Lemon zest (optional)

Preparation

  1. Preheat oven to 425 °F (220 °C).
  2. Place cauliflower and carrots on a parchment lined baking sheet. Drizzle butter over vegetables and toss to coat. Roast 25 to 35 minutes, turning halfway through, until vegetables are tender. Remove about 1/2 cup (125 mL) cauliflower florets and reserve to garnish soup. 
  3. Meanwhile, place onion, garlic, thyme, and bay leaf in a large saucepan. Add broth and simmer gently for 5 minutes or until onion is tender. Add roasted cauliflower, carrot, white beans, and mustard. Simmer gently for 8 minutes or until vegetables are very tender. Remove from heat. Discard bay leaf. Season with pepper and salt if needed. Stir in milk.  
  4. Cool soup slightly. Purée in batches until smooth. Serve in bowls. Garnish with roasted cauliflower florets, cheese, dill, and lemon zest (if desired). Serve with a whole-grain roll. 
Bulb

This soup is no ordinary soup! When paired with a whole grain roll, you have a complete meal on the table. The vegetables and white beans add precious fibre and the milk and cheese provide complete protein. These nutrients are essential to keep your hunger at bay until your next meal. 

For more great recipes, visit Dairy Farmers of Canada